Symfony Netbeans HelloWorld Tutorial
To day we will try to make a simple traditional "Hello World" application using the Symfony Framework in Netbeans, we will make this application from scratch, from configuring Symfony in Netbeans and then creating a module and so on, in a step by step manner.
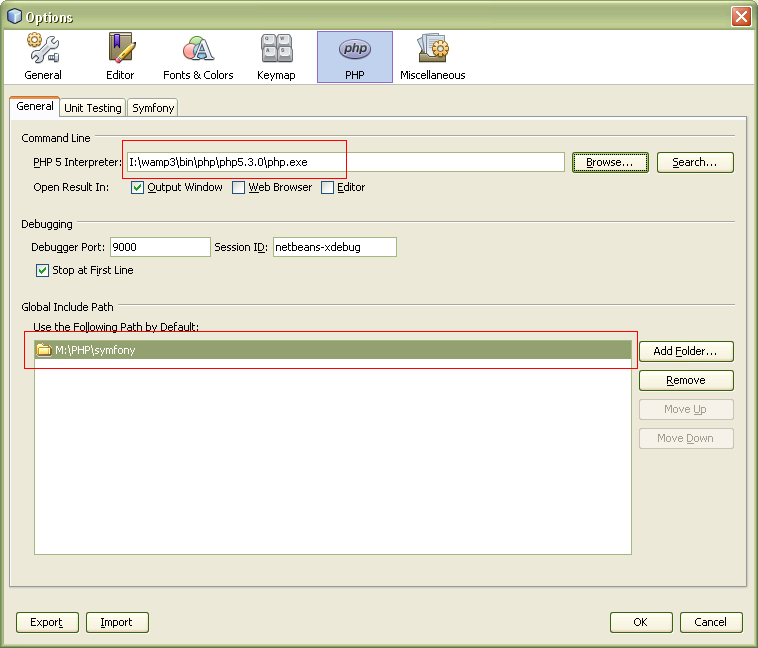
in PHP 5 interpreter filed browse to the PHP5 exe, which is located in %WAMP_INSTALL_DIR%\bin\php\php5.3.0\php.exe and below it there is an option for Global Include path in that Add the Folder of symphony (extracted one).
Now click on Symfony Tab
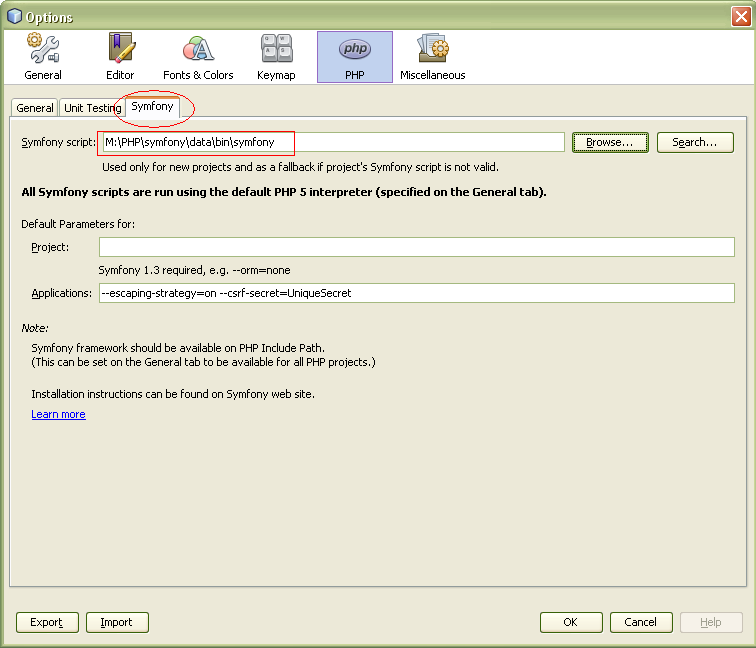 tell Netbeans where is Symfony Script is, it will be located in %SYMFONY_EXTRACTED_DIR%\data\bin\symfony notice it bin\symfony with out any extension, click Ok button.
Now create a new PHP Project File > New Project... > PHP > PHP Application and press Next Button
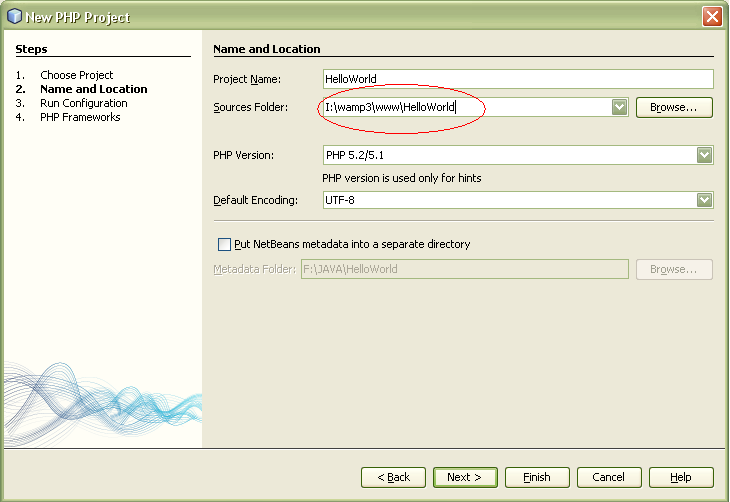
name the project as HelloWorld and save the project in www directory of WAMP it will be %WAMP_INSTALL_DIR%\www\HelloWorld Click next button twice and you will see following screen.
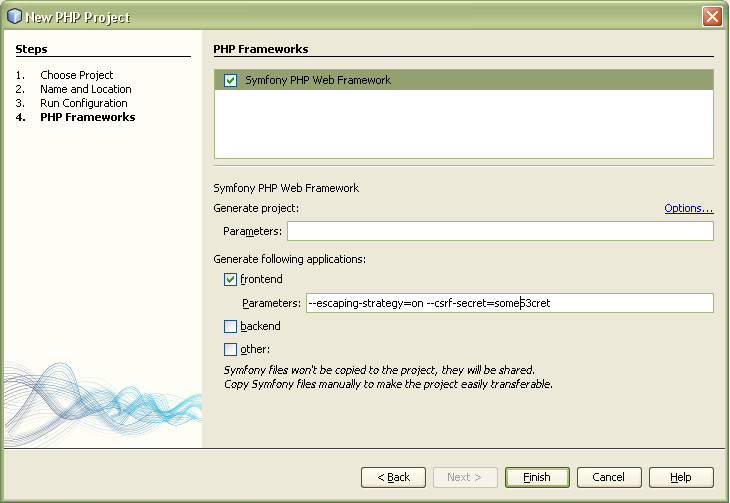
check the Symfony PHP Web Framework and click Finish. now Netbeans will create a Symfony Project with all the necessary configurations.
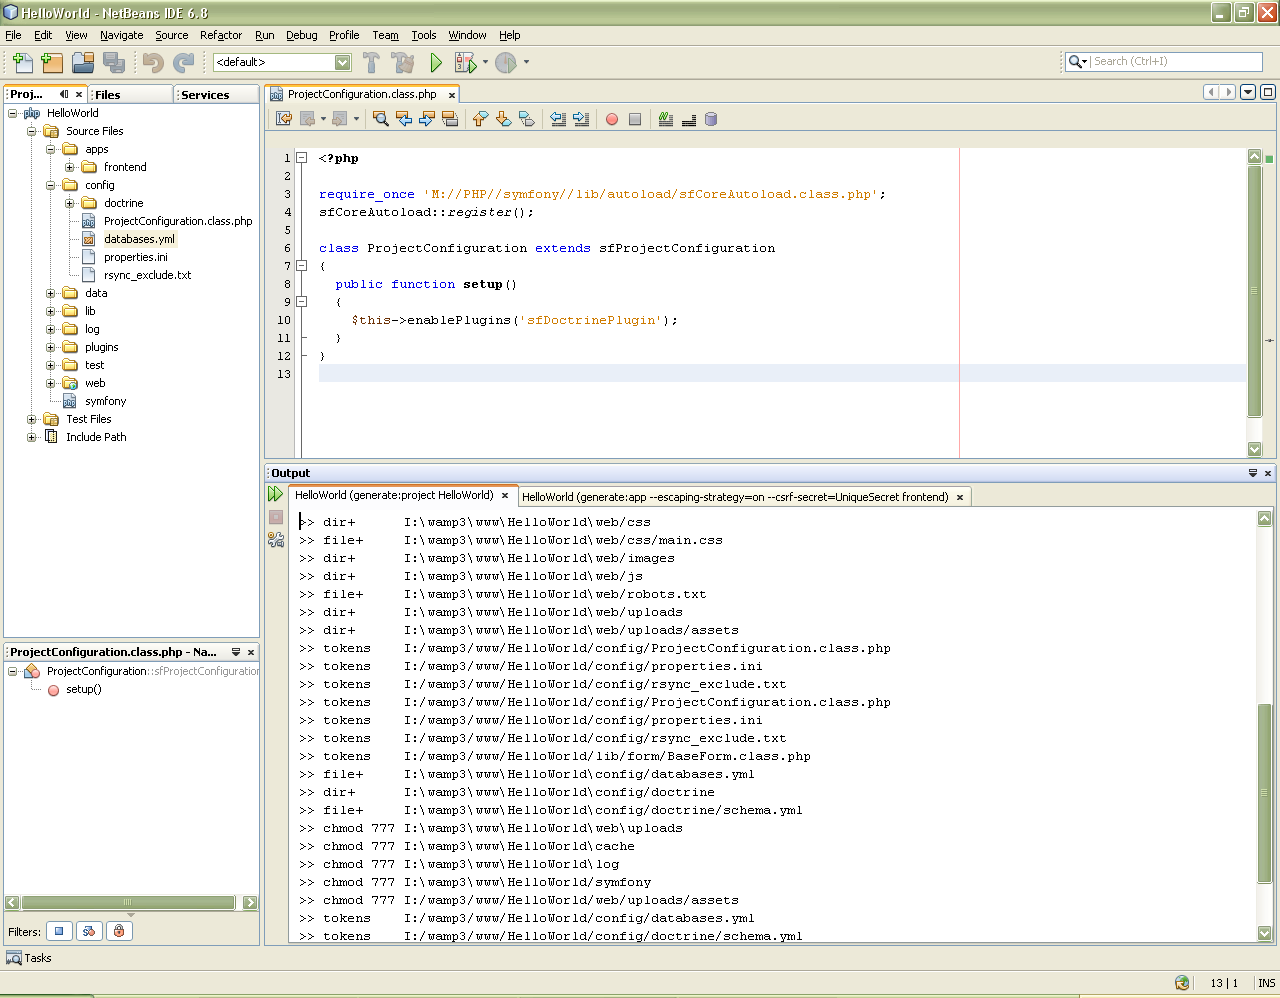
you will see a directory structure in Project window and a log of all the action taken by Netbeans, let run the project in a web browser, with following URL http://localhost/HelloWorld/web/
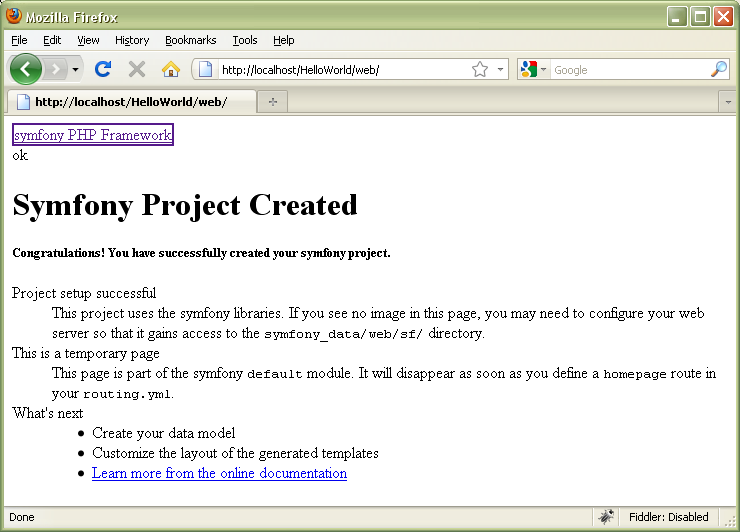
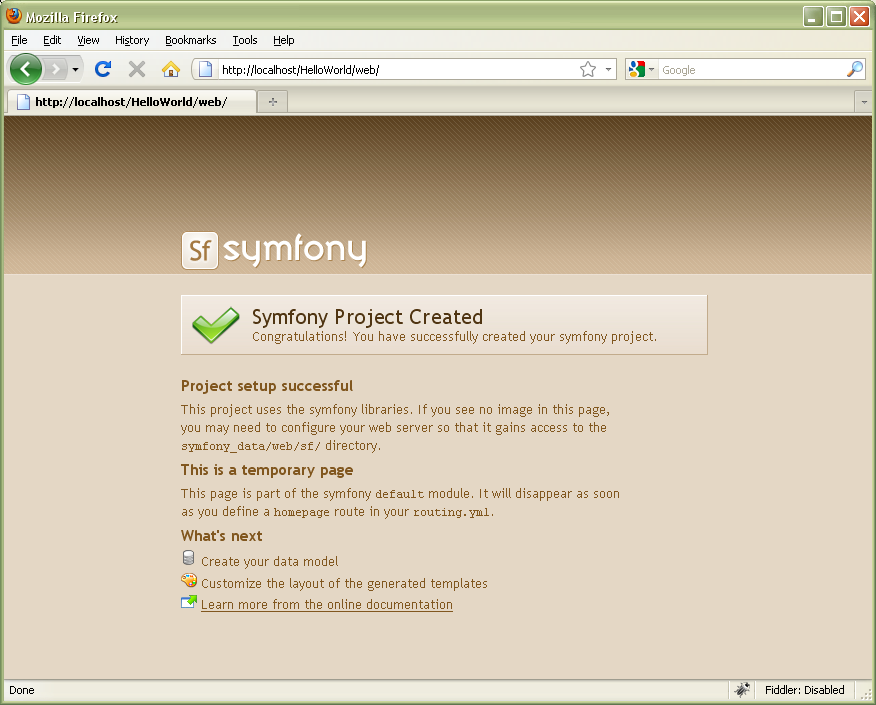
as you can see there is no CSS and images here, although Symfony is working, go to %SYMFONY_EXTRACTED_DIR%\data\web and copy the sf folder and paste it in web directory of your project and refresh the page and you see a nice Welcome page.
now back to Netbeans, create a module mySite ,to do this right click on Project > Symfony > Run Command ...
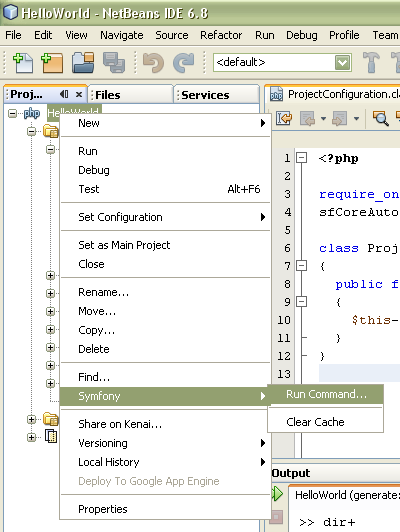 this will open a command console with all the command that Symfony support and it contains all the documentation associated with a command. we will use the generate:module command, we don't need to write the whole we just select the command form the list and provide parameters in the parameter filed in our case we pass frontend mySite telling symfony to create mySite module in fronted module. press Run Command.
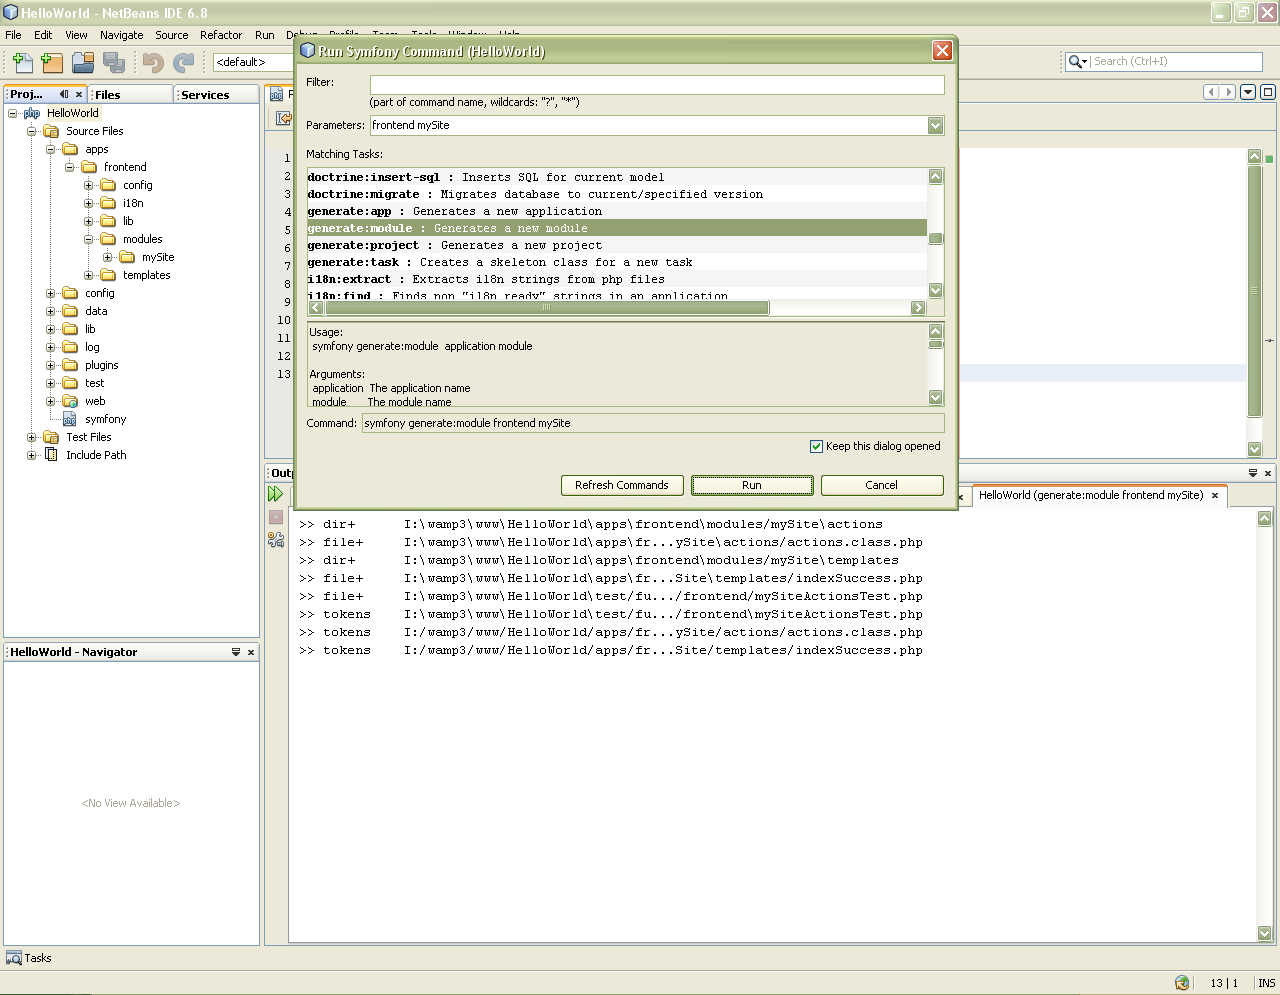
now if you see your directory structure you will notice a module mySite is created with its action (Controller) and templates (View) folder and a default files are also created.
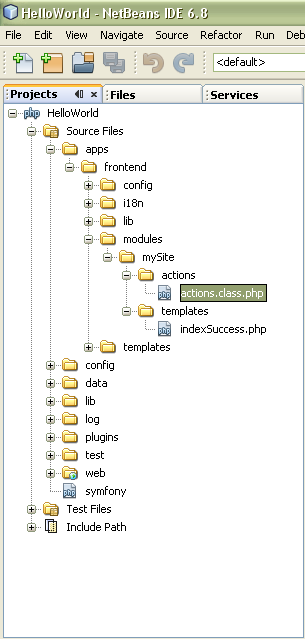
now open actions.class.php in actions folder and replace method executeIndex(sfWebRequest $request) with following code.
Prerequisites
- Symfony 1.4.x, you can download it form here
- Netbeans with PHP support, you can download it from here
- WAMP, you can download it from here
- Little knowledge of PHP :)
Lets Start
Install Netbeans, WAMP server and then unzip Symfony and rename then extract folder to symfony (for simplicity). Now open Netbeans and go to Tools > Options > PHP (tab)in PHP 5 interpreter filed browse to the PHP5 exe, which is located in %WAMP_INSTALL_DIR%\bin\php\php5.3.0\php.exe and below it there is an option for Global Include path in that Add the Folder of symphony (extracted one).
Now click on Symfony Tab
Now create a new PHP Project File > New Project... > PHP > PHP Application and press Next Button
name the project as HelloWorld and save the project in www directory of WAMP it will be %WAMP_INSTALL_DIR%\www\HelloWorld Click next button twice and you will see following screen.
check the Symfony PHP Web Framework and click Finish. now Netbeans will create a Symfony Project with all the necessary configurations.
you will see a directory structure in Project window and a log of all the action taken by Netbeans, let run the project in a web browser, with following URL http://localhost/HelloWorld/web/
as you can see there is no CSS and images here, although Symfony is working, go to %SYMFONY_EXTRACTED_DIR%\data\web and copy the sf folder and paste it in web directory of your project and refresh the page and you see a nice Welcome page.
now back to Netbeans, create a module mySite ,to do this right click on Project > Symfony > Run Command ...
now if you see your directory structure you will notice a module mySite is created with its action (Controller) and templates (View) folder and a default files are also created.
now open actions.class.php in actions folder and replace method executeIndex(sfWebRequest $request) with following code.
  public function executeIndex(sfWebRequest $request)
  {
    $this->greetings="Hello World, Symfony is Great :)";
  }
now open indexSuccess.php located in templates folder this file is by defualt empty, in it paste the following code
<?php
    echo "<h1>$greetings</h1>";
?>
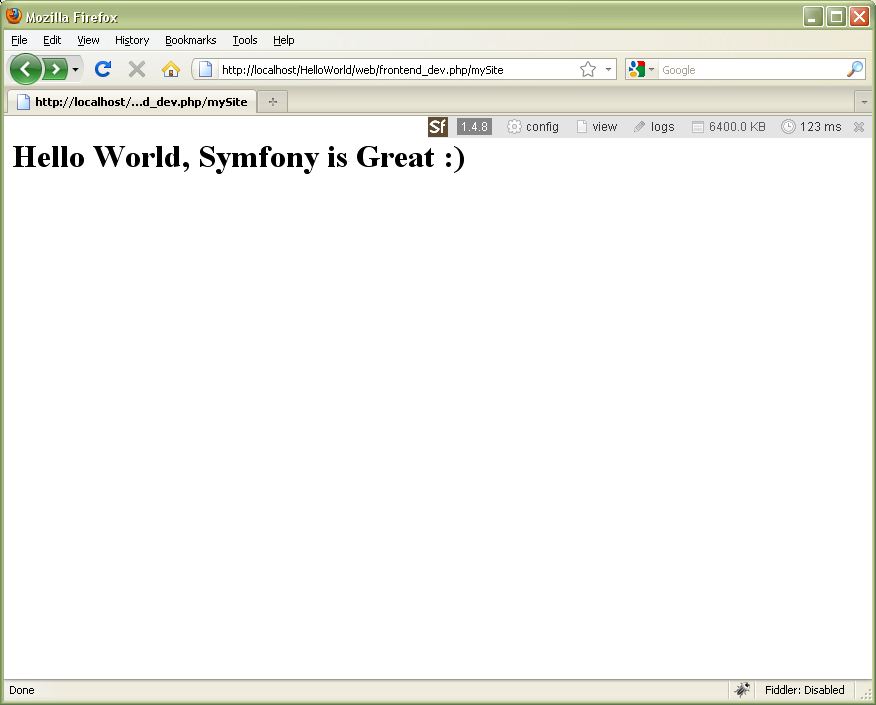
open web browser and navigate to the URL http://localhost/HelloWorld/web/frontend_dev.php/mySite it will also show a debugging toolbar which show very useful information, if you don't want debugging toolbar change URL to http://localhost/HelloWorld/web/index.php/mySite you should be able to see following page.
Click to Load Comments


